Showing posts with label WATER MARBLING. Show all posts

Sunday, April 8, 2012

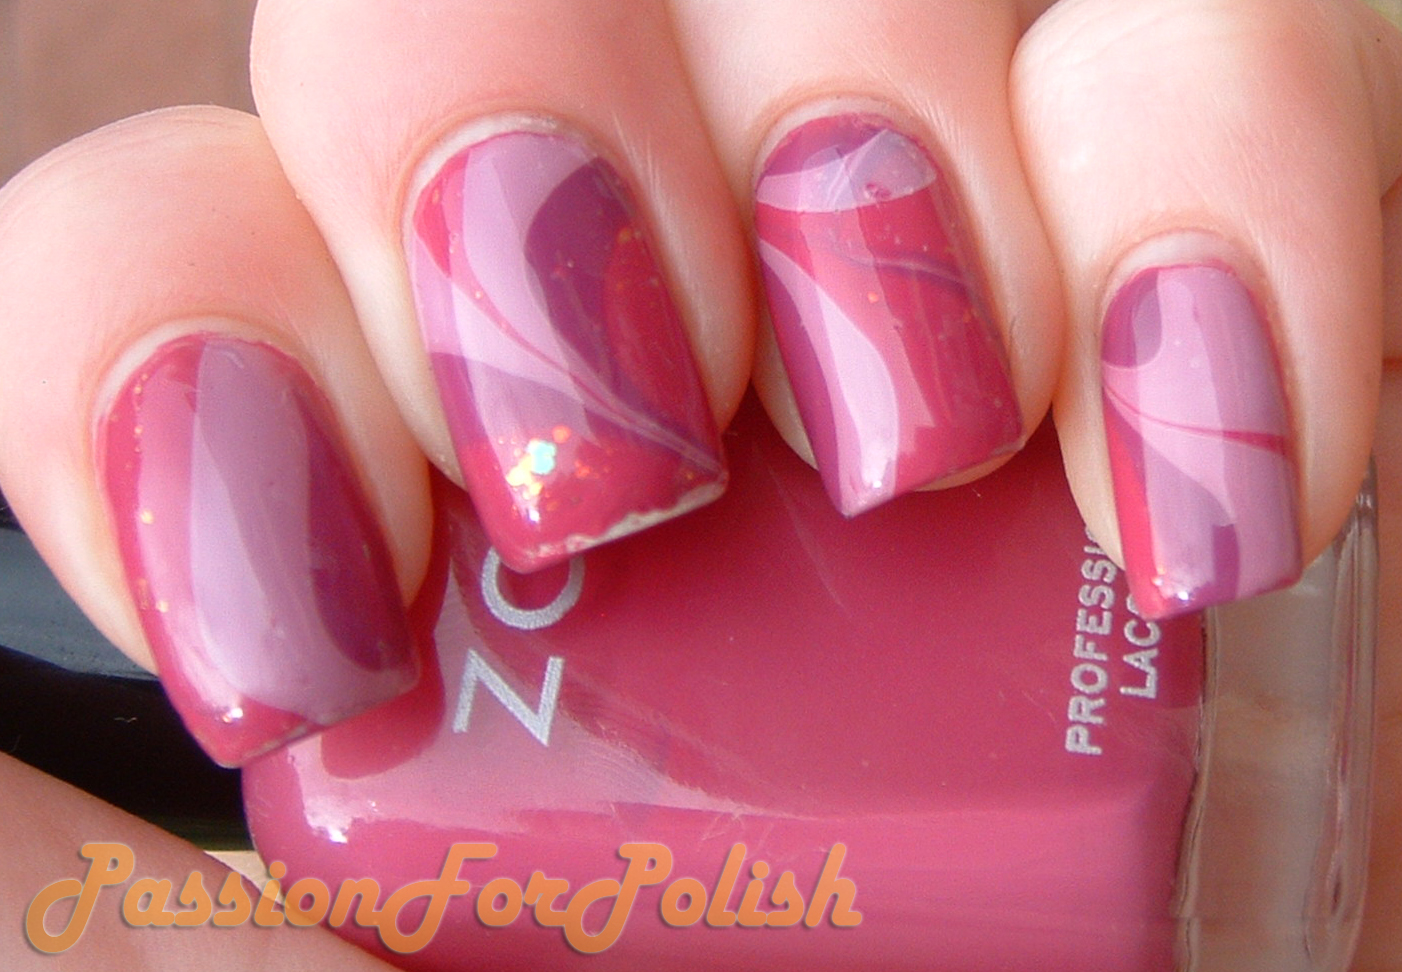
Pink and Flakie Water Marble (Pic Heavy)

I've been seeing some gorgeous water marbles popping up around the blogosphere and it made me want to give it a go again.

I used my Zoya Areej as my base colour and then used China Glaze Something Sweet, Zoya Areej, Zoya Kieko and Zoya Chloe for the water marble. I wasn't sure if a flakie would work for a water marble since I hadn't seen a water marble that used one so I decided to give it a go and it worked!

These are the photos of how my water marble turned out.

First my left hand, please ignore the polish I chipped off on my middle finger *oops*:

Pink and Flakie Water Marble in Artificial Light
Pink and Flakie Water Marble in Natural Light
Next my right hand :
Pink and Flakie Water Marble in Artificial Light

Pink and Flakie Water Marble in Artificial Light
Pink and Flakie Water Marble in Natural Light
My favourite thing about water marbles is that every nail comes out different! This is my favourite water marble I've done so far :) I really love this one and like the random bits of flakie goodness sparkling out.

Thursday, January 19, 2012

Water Marbling: Yellow and Green

I wanted to do another water marble manicure so I could write a tutorial for it at the same time. I decided to go with a simple design so I only used two nail colours. From watching videos and reading blogs I knew that Sally Hansen Xtreme Wear nail polishes usually work really well when water marbling. I used my Rimmel Green Grass manicure as my base.


So for this water marbling I chose Sally Hansen Xtreme Wear in Emerald City and Mellow Yellow. The first time I alternated the two colours creating 5 circles as the nail polish colours didn't disperse as well as I has hoped. Not wanting to waste the polish I did a small design, chose a spot and inserted my index finger. The second time I again alternated the same two colours but created 7 circles. This time the nail polish spread out very well, so I created a design and then inserted my other three fingers. I continued doing this for the remained of my nails.

Afterwards I peeled off my tape and then cleaned my nails. I added a top coat of Seche Vite because I didn't want to risk pulling my design. The following photo's were taken in artificial light.

Yellow and Green Water Pastel in Artificial Light

Yellow and Green Water Pastel in Artificial Light 

The following day I took more photo's in the sunlight.

 Yellow and Green Water Marbling in Natural Light

 Yellow and Green Water Marbling in Natural Light


I don't like the design on my index finger at all! I prefer the design that comes from creating a larger array of circles in the water such as that one my other three fingers. I still haven't gotten the hang of stopping the large air bubbles from forming and currently that's the only aspect that I hate about water marbling.

I recommend you try this technique for yourself, once you get the hang of it it's plenty of fun!
The following is a link to my How To: Water Marbling tutorial.

Monday, January 2, 2012

Spring Pastel Water Marbling

I had heard about water marbling and I decided to give it a go. I chose pastel colours because I know that China Glaze Up and Away Collection works very well for water marbling. Since I didn't want to spend an hour finding nail polish that works for marbling I picked those I knew would work.

I began with a single coat of Revlon Iced Mauve for my base colour. It was opaque with only one coat.

One Coat of Revlon Iced Mauve in Artificial Light

I used China Glaze Lemon Fizz, Peachy Keep, Light As Air and High Hopes. I added a drop of each nail polish and then repeated the sequence again. Then I pulled the nail polish into a design I liked. I did three of my fingers at once and then repeated the process doing my last finger.

I had lumps where air bubbles had gotten caught and then when I added a top coat of Seche Vite the air bubbles burst and you can easily see them in the photo below.


I only took photo's in artificial light the night I did the water marbling.

Pastel Water Marbling in Artificial Light

 Pastel Water Marbling in Artificial Light


This marbling didn't turn out quite the way I hoped because it had large air bubbles trapped under the surface.  I usually get small air bubbles when water marbling but I think the large ones appeared as I did three nails at once so as the water was displaced more air would enter the area where the next nail would press.

I had a lot of fun playing with water marbling. After doing this water marbling I decided to try other colours and went through about 10 different nail polishes before I found one that worked! So if you're going to try this I suggest you start with colours that other people can confirm work otherwise you'll probably get so frustrated you give up.