No post from me here today!
You can find me over at Karinea0e where I'm guest posting while Karine while she is away on vacation :) I had plenty of warning but I still forgot when my post was going up *oops*!!
Showing posts with label DOTTING. Show all posts
Wednesday, August 22, 2012
Wednesday, June 20, 2012
Black and White Dots
This is the final design I attempted before choosing my Black and White flower design to submit. I saw this design at Pshiiit and immediately wanted to try it.
I started with a coat of Ulta3 base coat then applied two coats of Ulta3 Lily White to all nails by my thumb and ring to which I applied a single coat of BYS Black Satin. Then I used my medium dotting tool in the opposite colour to the base colour and added a large amount of dots to the tip and then less as I got further down the nail. I sealed the design with a coat of Revlon Colorstay top coat.
Pictures ahead :) I managed to knock my ring finger and you can see my print on the design :(
Although I really love how this turned out I preferred my flower design for entering the competition. I really love the simplicity of this design and it was so quick and easy to do! This is definitely a design I'll try again with actual colour :)
I started with a coat of Ulta3 base coat then applied two coats of Ulta3 Lily White to all nails by my thumb and ring to which I applied a single coat of BYS Black Satin. Then I used my medium dotting tool in the opposite colour to the base colour and added a large amount of dots to the tip and then less as I got further down the nail. I sealed the design with a coat of Revlon Colorstay top coat.
Pictures ahead :) I managed to knock my ring finger and you can see my print on the design :(
![]() |
| Black and White Dots in Artificial Light |
![]() |
| Black and White Dots in Artificial Light |
![]() |
| Black and White Dots in Natural Light |
![]() |
| Black and White Dots in Natural Light |
![]() |
| Black and White Dots in the Shade |
Although I really love how this turned out I preferred my flower design for entering the competition. I really love the simplicity of this design and it was so quick and easy to do! This is definitely a design I'll try again with actual colour :)
Saturday, June 16, 2012
Black & White Abstract
Today I have another design I did but didn't enter into Berry Polished's Black and White Nail Art Competition. I found this design online, loved it and decided to give it a go. Unfortunately I'm pretty terrible at using my striper brushes but at least I'm practising (at least that's what I keep telling myself)!
I applied Ulta3 Base Coat and then two coats of Ulta3 Lily White. Then I used BYS Black Satin to diagonally cover half of my nail freehand. Next I used my Konad Black Nail Art Pen and drew three curved lines from the corner where the black and white meet across the white section of my nail. Between two of the curves I used a dotting tool and Lily White to make four dots. Then I did the same on the opposite side in opposite colours. I used a Konad White Nail Art Pen to draw the three lines into the black and the Black Satin for the dots. Then I used Ulta3 Non Chip as a top coat.
And here comes the photos.
I love the design but I have a long way to go before I can get my curved lines to appear as I want them to. I'm extremely awkward using the striping brush from the nail art pens but every now and then the curved lines would work as I wish. I was also way too impatient and threw on my top coat before eveything had dried properly *sigh* ah blast my impatience!
I applied Ulta3 Base Coat and then two coats of Ulta3 Lily White. Then I used BYS Black Satin to diagonally cover half of my nail freehand. Next I used my Konad Black Nail Art Pen and drew three curved lines from the corner where the black and white meet across the white section of my nail. Between two of the curves I used a dotting tool and Lily White to make four dots. Then I did the same on the opposite side in opposite colours. I used a Konad White Nail Art Pen to draw the three lines into the black and the Black Satin for the dots. Then I used Ulta3 Non Chip as a top coat.
And here comes the photos.
![]() |
| Black & White Abstract in Artificial Light |
![]() |
| Black & White Abstract in Natural Light |
![]() |
| Black & White Abstract in the Shade |
Saturday, April 28, 2012
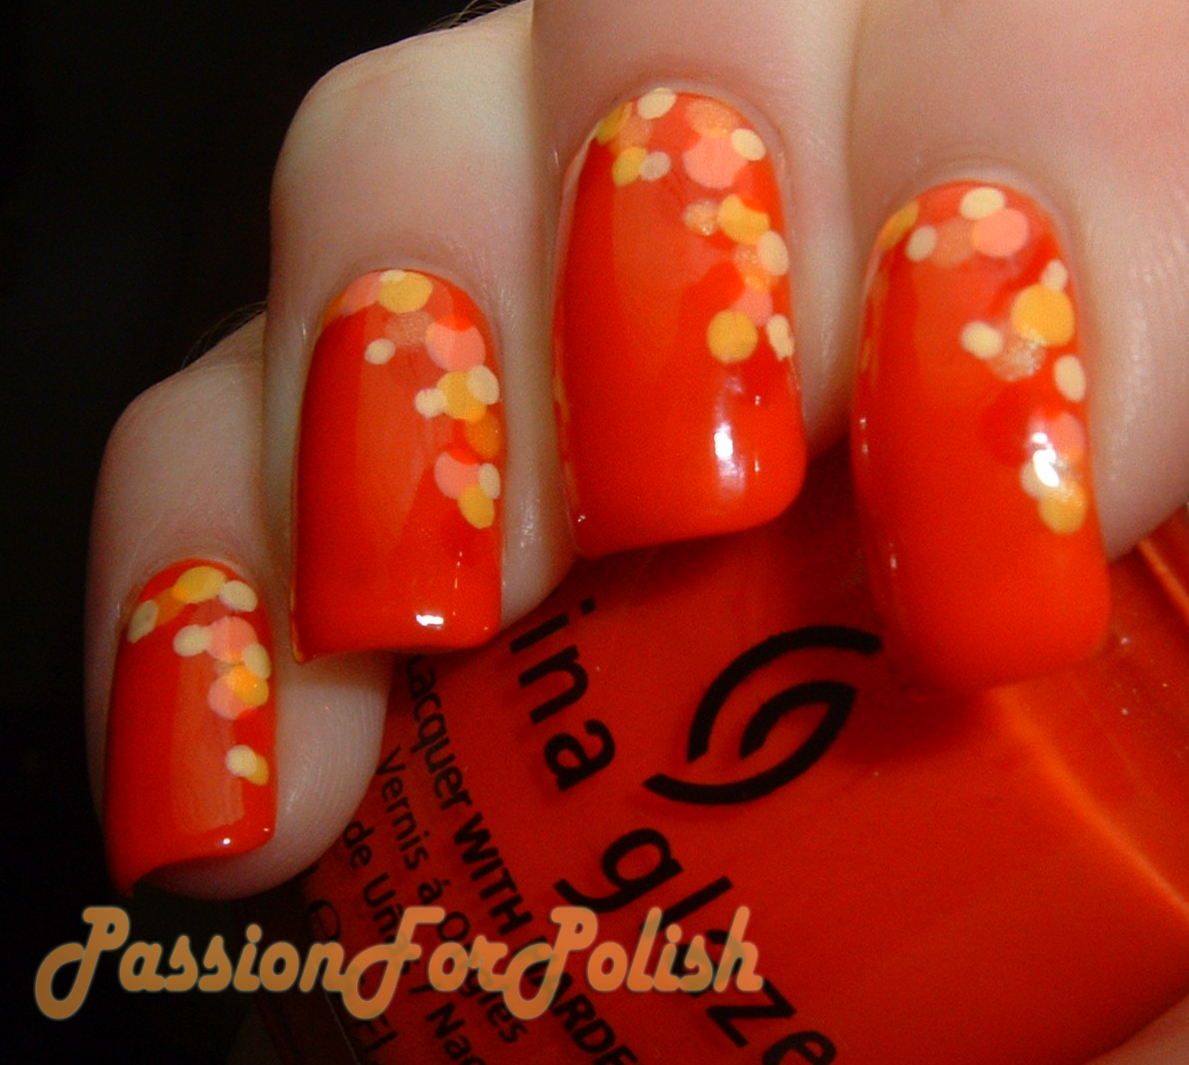
Summer Dotting!
I finally got around to trying one of the many, many, many bookmarked nail designs that I wanted to attempt. First up, I wanted to try this dotting design from Nail Polish Wars. I was using my previous manicure for my base colour and chose corresponding summery colours.
I used the largest of my five dotting tool and added drops randomly along one side of each nail in China Glaze Poinsettia and China Glaze Peachy Keen. Then I moved down one size in my dotting tools and used China Glaze Happy Go Lucky, again placing random dots along the same side. Again, I moved down another size in my dotting tools and added dots with the others in China Glaze Oh How Street It Is and Color Club I Always Get My Mandarin. Lastly, I used China Glaze Lemon Fizz using a smaller dotting tool again. Then I sealed it off with Sally Hansen Mega Shine.
Unfortunately, I only have photos in artificial light because it was raining the next few days when I was wearing this :(
I absolutely love how this turned out! I was a bit worried when I started because Poinsettia and How Street It Is didn't really show up extremely well again Style Wars but I think it worked out well. I decided to overlap each dot and I like how it worked. I would definitely try this again and would like to try this without overlapping the dots to see how it turns out!
Well I'm off to see the Avengers! Oh and if you could let me know if the word verification is off now? I tried to remove it but I'm not sure if it worked. Thanks!
I used the largest of my five dotting tool and added drops randomly along one side of each nail in China Glaze Poinsettia and China Glaze Peachy Keen. Then I moved down one size in my dotting tools and used China Glaze Happy Go Lucky, again placing random dots along the same side. Again, I moved down another size in my dotting tools and added dots with the others in China Glaze Oh How Street It Is and Color Club I Always Get My Mandarin. Lastly, I used China Glaze Lemon Fizz using a smaller dotting tool again. Then I sealed it off with Sally Hansen Mega Shine.
Unfortunately, I only have photos in artificial light because it was raining the next few days when I was wearing this :(
![]() |
| Summer Dotting in Artificial Light |
![]() |
| Summer Dotting in Artificial Light |
![]() |
| Summer Dotting in Artificial Light |
![]() |
| Summer Dotting in Artificial Light |
Well I'm off to see the Avengers! Oh and if you could let me know if the word verification is off now? I tried to remove it but I'm not sure if it worked. Thanks!
Sunday, March 4, 2012
Swirls and Dotted Flowers
I wanted to play around with a nail art brush that my sister in law had given me so I started with my Nicole by OPI It Starts With Me manicure. I freehanded an accent across the tips of my nails in Nicole by OPI Play Fair. Then I used the nail art brush to draw swirls using Play Fair from the accent down the nail and then used It Starts With Me to draw swirls in the opposite direction up the nail. Finally I used Nicole by OPI Positive Energy across the lines of It Starts With Me and Play Fair.
Then I figured why not play around with my nail art pens? So I used my Konad Nail Art Pen in white to draw and flower and dotted swirls in opposite directions on the sides of the flower. I used my Konad Nail Art Pen in black for the centre of the flower. Then I added a coat of Seche Vite Dry Fast top coat and Sally Hansen Insta-Dri Quick Dry Drops.
These photo's were taken that night in artificial light.
The following day I took these photo's outside in the sunlight.
I love the flowers and the dotted swirls but I think I need to get a new nail art brush for fine work. I really love the silver Positive Energy and I can't wait to use it again in nail art! I wish I had left it with the pink accent and then the dotted flowers and dotted swirls. It's funny because the swirls look much better in these photo's than in real life and that's saying something lol.
Then I figured why not play around with my nail art pens? So I used my Konad Nail Art Pen in white to draw and flower and dotted swirls in opposite directions on the sides of the flower. I used my Konad Nail Art Pen in black for the centre of the flower. Then I added a coat of Seche Vite Dry Fast top coat and Sally Hansen Insta-Dri Quick Dry Drops.
These photo's were taken that night in artificial light.
![]() |
| Swirls and Dotted Flowers in Artificial Light |
![]() |
| Swirls and Dotted Flowers in Artificial Light |
![]() |
| Swirls and Dotted Flowers in Natural Light |
![]() |
| Swirls and Dotted Flowers in Natural Light |
I love the flowers and the dotted swirls but I think I need to get a new nail art brush for fine work. I really love the silver Positive Energy and I can't wait to use it again in nail art! I wish I had left it with the pink accent and then the dotted flowers and dotted swirls. It's funny because the swirls look much better in these photo's than in real life and that's saying something lol.
Subscribe to:
Posts (Atom)